












Leveling Route: Level 1 to 80
A complete progression route for new and returning players: team setup, economy, market breakpoints, Cube leveling, farming, and stage pushing.
Goal
Use this route when you want a clear path from a fresh account to level 80 without wasting early gold, materials, or market purchases. The route is built around one principle: stable farming beats risky pushing.
Task Bar Hero can be played free-to-play. Paid pets can speed up early tempo, but the core loop does not require them. Your real progression engine is a stable team, good stage selection, smart alchemy, account-wide rune upgrades, and cheap gear replacements at level breakpoints.
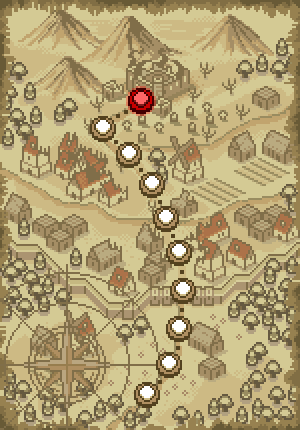
Full Route Summary
| Phase | Main target | What matters most |
|---|---|---|
| Level 1-10 | Establish tempo | Claim Priest, build a stable duo, start basic rune progress. |
| Level 10-20 | Unlock party foundation | Move toward 3 hero slots and early sustain. |
| Level 20-30 | Stabilize farming | Upgrade cheap level 20-30 gear, start meaningful alchemy. |
| Level 30-40 | Connect economy systems | Keep Cube close to hero level, farm useful item bands. |
| Level 40-50 | Replace old gear | Buy or farm cheap level 40-50 upgrades, improve chest income. |
| Level 50-65 | Prepare for harder walls | Add resistance, sustain, and role-specific gear. |
| Level 65-80 | Farm targeted breakpoints | Rotate farm stages by item level instead of sitting on one stage. |
Step 1: Build Tempo, Not Just Damage
Early progression is not only about increasing DPS. You need a team that can clear consistently while generating EXP, gold, chests, and item drops. Every system feeds another system:
A team that dies often loses time even if its damage looks high. Your first goal is a stable farming base.
Step 2: Claim Priest Early
Claim the free Priest DLC as soon as possible. Priest is one of the best early pieces because she adds healing and support before your gear is strong enough to solve survival alone. Use the Heroes Database and Skills & Passives pages if you want to inspect her kit beside Knight and Ranger.
If you start with Ranger, the early duo is simple:
Frontline or safer slot: Priest
Damage slot: Ranger
Goal: survive long enough for Ranger to clear waves
After the third hero slot, the safest default team is:
Frontline: Knight
Support: Priest
Damage: Ranger
Knight absorbs pressure, Priest keeps the run stable, and Ranger gives clear speed. You can experiment with Priest + Ranger + Sorcerer or Knight + Ranger + Sorcerer for faster farming, but return to Knight + Priest + Ranger if the team becomes fragile.
Step 3: Unlock 3 Hero Slots
The third hero slot should be your first major account milestone. It usually gives more value than one expensive item because it adds damage, survival, shared leveling, and AFK stability at the same time.
Priority order:
Avoid spreading early gold across low-impact comfort upgrades if it delays the third slot.
Step 4: Use Level Breakpoints For Gear
Do not try to buy perfect items. The efficient market route is to buy cheap, role-correct items at rough breakpoints:
| Character level | Gear action |
|---|---|
| 10 | Buy only very cheap role pieces if drops are weak. |
| 20 | Replace obvious low-level weapons or armor. |
| 30 | Check market again; this is a strong alchemy and gear breakpoint. |
| 40 | Replace old items that are still carrying from the 20s. |
| 50 | Start caring more about defensive rolls and role fit. |
| 65 | Prepare for harder stage walls and targeted item-level farming. |
Before buying, check level requirement, stats, role fit, price, and whether the item could be resold later. Legendary does not automatically mean useful.
Step 5: Keep Cube Level Close To Hero Level
Cube progress is strongest when the items you feed into it are close to the Cube's useful level range. A very high-level item is not always efficient if your Cube is far below that range.
Use the Synthesis screen as your reference. The highest item level range shown there tells you what item levels are useful for your current Cube progress. If your Cube is around level 40, items around level 30-50 are usually more relevant than much higher items. The Cube System, Synthesis, and Grades pages are the best references when checking unlocks and rarity value.
The ideal loop is:
Farm stage -> gain hero EXP and gold -> collect items near your Cube range -> alchemy weak items -> level Cube -> unlock better synthesis and systemsIf Cube falls behind, farm stages that drop item levels closer to your current Cube needs. If Cube gets ahead of your heroes, farm gear bands that still match the Cube range instead of blindly pushing.
Step 6: Decide Push Stage vs Farm Stage
A push stage is a stage you are trying to clear for progression. It can be slow and risky. A farm stage is a stage you can clear quickly, repeatedly, and safely.
Use this rule:
Push the highest stage you can clear.
Farm the highest stage you can clear efficiently.
If your newest stage wipes you, takes too long, or fills inventory with too little reward, go back. Stable lower farming often beats unstable higher farming. Check the Stages Catalog and Stage Boxes pages before committing to a farming band.
Step 7: Use Online Farming For Items
Closed-game/offline progress can give EXP and gold when you have the right upgrades, but it does not replace open-game item farming. Chests, alchemy fuel, crafting materials, and marketable drops mostly come from keeping the game running.
When farming online:
Step 8: Do Not Over-Hoard, But Do Not Burn Everything
Weak equipment can become alchemy fuel. Valuable equipment can be sold or used. Crafting and socket materials are harder to judge early, so avoid dumping them for quick gold.
The item cycle is:
Use upgrades -> sell valuable pieces -> alchemy weak equipment -> save special materialsIf you craft an item using components bought from the market, expect trade restrictions before you can sell that crafted item. This matters if you are trying to cycle items through the market.
Step 9: Farm Pets When The Stage Is Comfortable
Pet bonuses become active once unlocked; they do not need to be equipped for their passive value. That means the long-term goal is to unlock multiple pets over time.
Do not farm a pet if it destroys your overall tempo. Use the Pets Database and Monsters Database to confirm the target before committing. Farm a pet when:
Recommended unlock order:
Bat -> Dark Spirit -> Watcher -> Burning Skeleton -> Blue GolemBurning Skeleton and Blue Golem can be delayed until harder difficulties if Normal spawn rate and kill speed are poor.